

How to Test Well Water Hardness at Home
Table of Contents
- Understanding Water Hardness and Why Testing Matters
- Signs of Hard Water in Your Home
- How to Test Water Hardness With Test Strips
- How to Read Water Hardness Test Results
- Testing Well Water Hardness With Dish Soap
- How Often to Test Well Water for Hardness
- Test Accuracy, Limitations, and When to Use a Lab
- What to Do After Getting Your Test Results
- Frequently Asked Questions
Last Updated: October 18, 2026
Understanding Water Hardness and Why Testing Matters
Water hardness is the concentration of dissolved minerals, primarily calcium and magnesium, in your water supply.
Well water hardness varies dramatically by location, some wells run soft, others so mineral-heavy that basic cleaning becomes difficult. The only way to know your level is to test; without it, you're guessing about a problem affecting your water heater, dishwasher, washing machine, and plumbing daily.
At The Water Softener Company, we help homeowners understand their water quality to make informed treatment decisions. Testing is the first step, it takes minutes and costs almost nothing.

Signs of Hard Water in Your Home
Watch for these common indicators that hard water is affecting your home.
Visible buildup on fixtures: White, chalky calcium carbonate residue on faucets, showerheads, and sink drains signals high mineral content.
Soap and detergent problems: Soap won't lather, showers feel slippery, you use more soap and shampoo, and laundry comes out dull and stiff.
Plumbing concerns: Pipes accumulate mineral deposits, pressure drops gradually, and severe cases clog entirely. Replacing corroded plumbing is expensive.
If you're seeing multiple signs, your well water hardness is likely significant. Testing confirms the severity so you know whether treatment is necessary.

How to Test Water Hardness With Test Strips
Test strips are the fastest, easiest way to check well water hardness at home, inexpensive, no special equipment, results in seconds. Most measure in parts per million (ppm) or grains per gallon (gpg), but they only work if you sample and read them correctly, and well water adds wrinkles city-water guides skip.
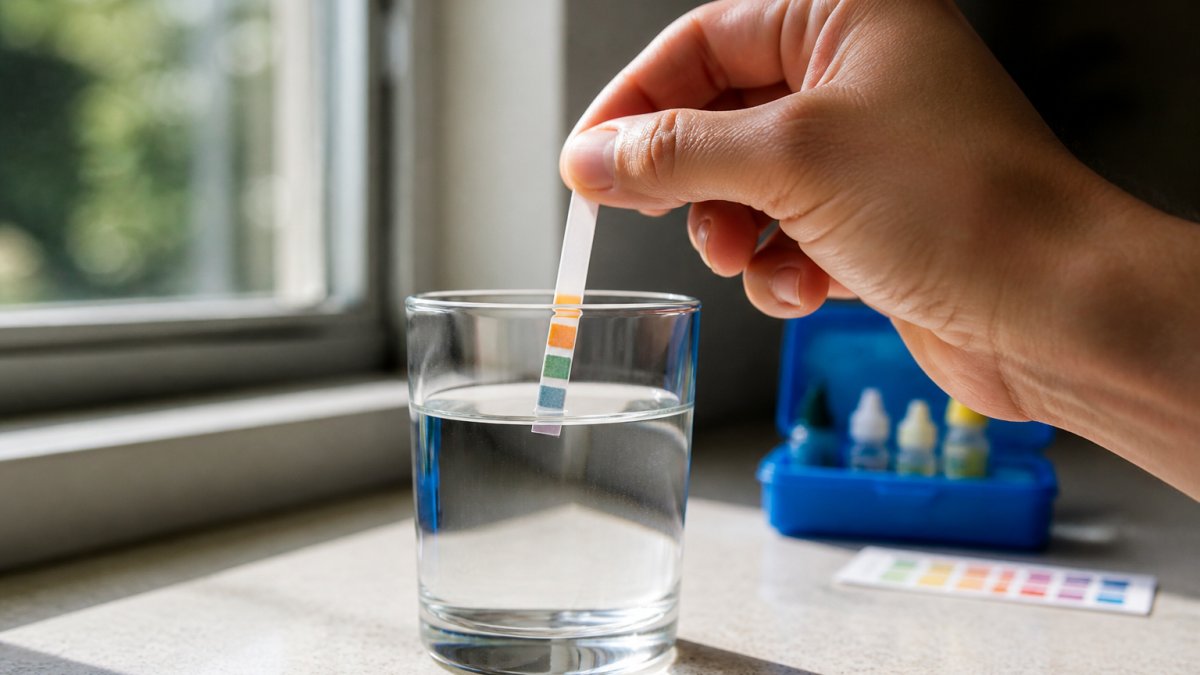
Selecting the Right Well Water Hardness Test Kit
A water hardness test kit should measure calcium and magnesium specifically. Look for kits designed for untreated water, with a color chart on the bottle, a desiccant pack, and a clear expiration date.
The Water Softener Company includes water hardness test strips with every system so you can verify your water hardness level and set the system properly. These strips are calibrated for accuracy and come with a clear color-matching guide.
Quality matters, cheap strips give inconsistent results.
A Well-Specific Sampling Protocol
Most strip instructions assume treated municipal water. Well water needs a more careful draw because sediment, iron, and stale pipe water can skew the reading. Follow this protocol for a representative sample.
Choose the right sampling point. Use a cold-water tap straight off the well line, typically a kitchen or utility sink, bypassing any inline filter, softener, or reverse-osmosis unit.
Collect in a clean container. Use a clean glass or sample cup rinsed twice with the water you're about to test.
Mind the temperature. Strips are calibrated for room-temperature water, roughly 68°F to 77°F.
Step-by-Step Testing Process
Testing well water hardness takes about five minutes. Follow these steps for accurate results.
Step 2: Dip the test strip Remove one strip and recap the bottle immediately so the rest stay dry.
Step 3: Remove and shake off excess Pull the strip out and gently shake off any excess water.
Step 4: Wait for color change Most strips show color changes within 30 to 60 seconds.
Step 6: Record your result Write down the number, the date, the sampling point, and the unit (ppm or gpg) so you can compare results over time.
Keeping Strips Accurate
Strip accuracy depends on storage and handling as much as technique. Keep strips in the original bottle, cap tight, desiccant in place, humidity degrades the reagents. Store away from bathrooms and laundry rooms, where steam and heat shorten shelf life. Never touch the color pads or use an expired strip, which can read low even when hardness is high. If a result looks off, retest with a fresh strip from a different bottle before acting.
How to Read Water Hardness Test Results
Your test strip gives you a number that tells you exactly how hard your water is. Understanding what it means, and what it doesn't, is the key to deciding whether you need treatment.
Understanding Hardness Units and Scales
Water hardness is reported in several units, and the same water can carry different numbers depending on the kit. Knowing how to convert keeps you from comparing apples to oranges.
- Parts per million (ppm) and milligrams per liter (mg/L) are numerically equivalent for dilute samples: 1 ppm equals 1 mg/L. When a lab reports hardness "as calcium carbonate (CaCO3)," it expresses combined calcium and magnesium on a common scale so results from different labs can be compared.
- Grains per gallon (gpg) is the unit most water-treatment sizing uses. One gpg equals approximately 17.1 ppm (or 17.1 mg/L) as CaCO3. To convert ppm to gpg, divide by 17.1; to convert gpg to ppm, multiply by 17.1.
- Milligrams per liter as CaCO3 is the form most certified labs report. If your strip reads in ppm and your lab report reads in mg/L as CaCO3, the numbers should be close, but confirm the lab's reporting basis, because some labs report calcium and magnesium separately rather than combined.
A quick conversion table helps:
| Hardness (ppm or mg/L as CaCO3) | Hardness (gpg) | Common classification |
|---|---|---|
| 0-60 | 0-3.5 | Soft |
| 61-120 | 3.6-7.0 | Slightly hard |
| 121-180 | 7.1-10.5 | Moderately hard |
| 181-250 | 10.6-14.6 | Hard |
| Above 250 | Above 14.6 | Very hard |
These ranges follow the widely used classification popularized by the U.S. Geological Survey and echoed by water-treatment manufacturers. Sources nudge the boundaries by a few ppm, so treat the categories as guides, not legal thresholds.
If your result falls in the moderately hard range or higher, your well water would benefit from treatment.
What a Hardness Result Does Not Tell You
A hardness test measures calcium and magnesium, nothing else. It is not a potability test. A strip reading 12 gpg tells you the water will scale your fixtures; it says nothing about whether the water is safe to drink.
Untreated well water can carry bacteria, nitrates, arsenic, iron, manganese, sulfur, and other contaminants a hardness strip will never detect. Iron and manganese can foul a softener and cause staining that looks like hardness but isn't.
Testing Well Water Hardness With Dish Soap
Not everyone has test strips on hand. A dish soap test is a quick, free alternative to check whether your water is hard.
Fill a clear bottle halfway with water from your tap. Shake vigorously for 10 seconds. Soft water produces a thick layer of bubbles that lasts for several minutes.
This works because minerals interfere with soap's ability to lather. The cloudiness you see is soap binding to calcium and magnesium instead of creating lather.
Use this test to confirm a problem exists before investing in strips or professional testing.
How Often to Test Well Water for Hardness
Test your well water hardness at least once per year. Many homeowners test when they first discover a problem, then forget. Annual testing tracks whether hardness levels change over time.
Well water mineral content can shift seasonally: spring runoff sometimes dilutes concentration, while dry seasons can increase it. Annual testing reveals these patterns and helps you understand your water's behavior year-round.
If you install a water softener or other treatment system, test every 6 months for the first year to verify the system is working correctly.
Test more frequently if you notice sudden changes in water quality, taste, or appearance. A sudden increase in limescale or soap problems might indicate a shift in your well water chemistry that deserves investigation.
Test Accuracy, Limitations, and When to Use a Lab
Test strips are reliable for most homeowners, but they have limits. Strip accuracy depends on proper technique. Expired strips give wrong results. Color-matching in poor lighting causes misreading.
If your result seems unusually high or low compared to what you observe at home, repeat the test with a fresh strip, use natural daylight for color matching, and collect a new sample.
For very high hardness (above 250 ppm), consider sending a sample to a professional lab.
Professional lab testing costs more than strips but provides comprehensive information about your well water quality, especially valuable before investing in a treatment system.
What to Do After Getting Your Test Results
Your test result is just the starting point. Now you know your hardness level; the next step is deciding whether treatment makes sense for your situation.
If your hardness is in the soft to slightly hard range, you probably don't need treatment. Monitor your water annually and watch for changes.
If your hardness is moderate to very hard, treatment becomes practical.
The Water Softener Company offers systems designed specifically for well water.
Before choosing a system, confirm your hardness level with a test strip, know your household water usage, and understand your space limitations, these determine which system size and type works best.
Frequently Asked Questions
How can I check the hardness of my well water at home?
The easiest method is using a water hardness test strip, which costs $10-$30 and provides results in minutes. Dip the strip into a water sample, wait 60 seconds, and match the color to the included chart. For a free alternative, use the dish soap test: fill a jar with well water, add 10 drops of dish soap, shake vigorously for 10 seconds, and observe the lather. Thick, fluffy lather indicates soft water; thin or no lather suggests hard water. Test strips offer precise measurements in parts per million (ppm) or grains per gallon (gpg), while the soap test is qualitative only.
How often should I test my well water for hardness?
Test your well water for hardness at least once per year, ideally in spring after winter runoff. Test more frequently, every 3-6 months, if you've recently installed a water softener to verify it's working correctly, or if you notice changes in water quality like increased limescale, cloudiness, or odor. Seasonal variations in mineral content can occur, especially in areas with significant precipitation changes. If you rely on well water and have never tested it, conduct an initial test to establish a baseline, then follow up annually.
What do the results of a water hardness test mean?
Water hardness is measured in parts per million (ppm) or grains per gallon (gpg). Results below 60 ppm (0-3.5 gpg) indicate soft water; 61-120 ppm (3.5-7 gpg) is moderately hard; 121-180 ppm (7-10.5 gpg) is hard; and above 180 ppm (10.5+ gpg) is very hard. Hard water contains dissolved calcium and magnesium minerals. Higher hardness levels accelerate limescale buildup on fixtures and appliances, reduce soap and detergent effectiveness, and can affect skin and hair. If your well water tests above 120 ppm, a water softener can reduce hardness and its effects on your plumbing and appliances.
How accurate are at-home water hardness test kits?
At-home test strips are generally accurate within ±10-15% when used correctly, making them reliable for identifying whether water is soft, moderately hard, or very hard. Accuracy depends on following instructions precisely: using a clean container, testing at room temperature, and reading the color match carefully within the time window. For critical decisions, such as sizing a water softener or identifying contamination concerns, send a sample to a certified laboratory for comprehensive analysis. Labs can detect specific contaminants and provide results traceable to EPA standards, whereas test strips measure hardness only. Repeat your at-home test 2-3 times to confirm results, as inconsistencies may indicate operator error or kit age.
Hard water is manageable once you understand what you're dealing with. Testing your well water hardness takes minutes and costs almost nothing. The information you gain guides every decision that follows. Start with a simple test strip, read your result carefully, and decide whether treatment fits your needs. The Water Softener Company is here to help you find the right solution for clean, soft, and healthy water throughout your home.